Welcome to my first 3d tutorial. Here I’ll show you how I made a victorian street scene in 3dsmax…

It’s been a while since posting a tutorial (or anything else) so I thought I’d put some effort into showing the steps I went through to make this victorian street scene (click for larger view)…
 I love two quite contrasting themes in the art & architecture design world: retro futurism and gritty victorian aesthetics.
For a more detailed look at the techniques used in this piece, I suggest you visit the tutorials section of the evermotion web site. Here’s a link to part 1 of a 3 part feature on low poly building modelling.
This piece had 3 main components that made it possible to create:
- The technical means to achieve it via the above tutorial (plus whatever I myself have to contribute).
- Decent high res building textures from here: cgtextures.com and here: isourcetextures.com. The former is free, the latter you have to pay for each texture, but, the price is per image and is only like $2! A lot of similar sites charge about a hundred for a pack, so this is awesome.
- Research. I spent a LONG time trying to find as many photos of Victorian England/London as I could. The Roman Polanski version of Oliver Twist was a good source of reference.
Here are the various stages I went through in making the Victorian Street…
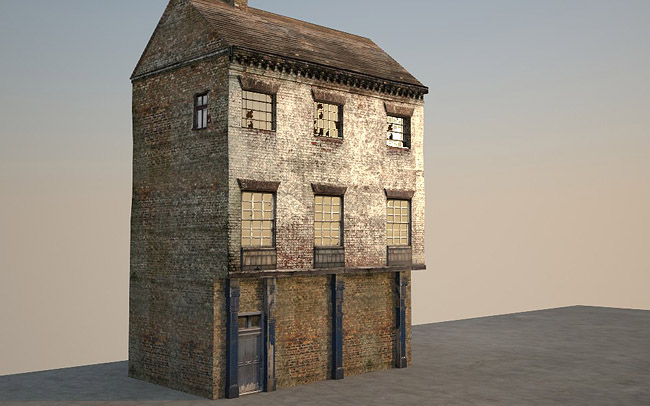
I began with a plane and applied my high res building texture to it. I then collapsed it to ‘Editable Poly’ and used the ‘Swiftloop’ tool to cut horizontal and vertical edges where I could then extrude in/out to make windows etc. I would also create basic geometry and ‘Attach’ that geometry to the editable poly.
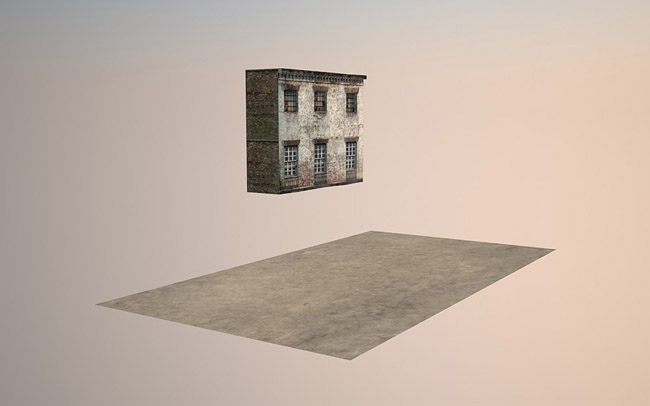
 I then created the roof. Again, you’ll see an example on how to do that in the video tutorial linked above (well, I think he goes into roof detailing in the 2nd or 3rd video).
 I basically took a box, textured it so I could see it in the viewport and used ‘Swiftloop’ to score edges along all the horizontal lines the tiles make. I then pick each edge and lift it to create a zig zag side profile. This gives the illustion of rows of tiles. Here’s the mesh close up:
 I then started on the ground floor. This time, instead of taking a building texture, I built it from scratch. I looked at a good few images from period movies and copied the basic style of the windows and posts. The door was a photo texture from cgtextures.
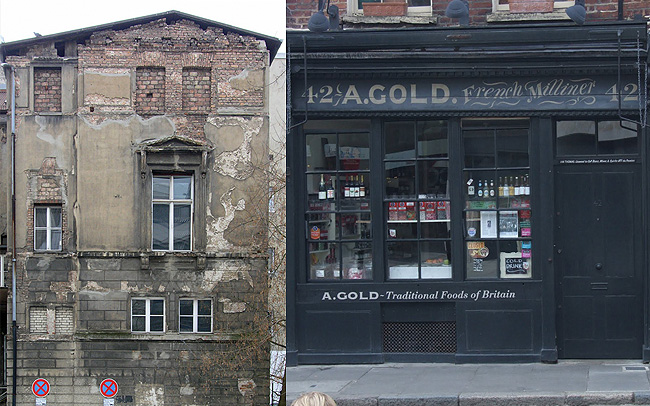
 Next up came the second building. This time I created the whole front face by merging a couple of textures.
 Here are the two orignal textures:
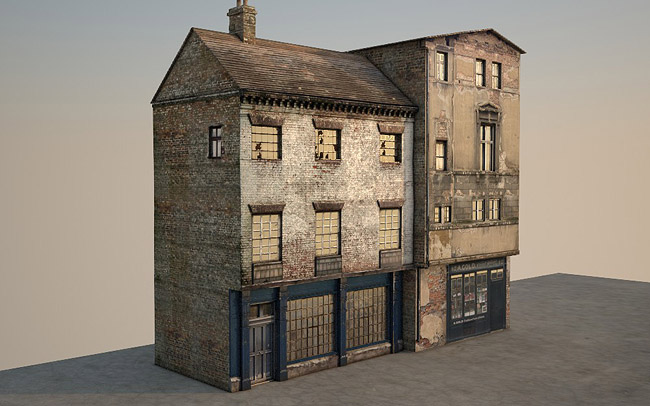
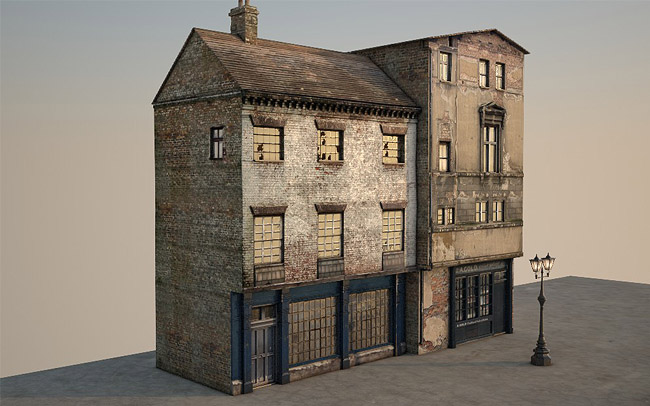
Here are the diffuse, bump and reflection maps (in that order):
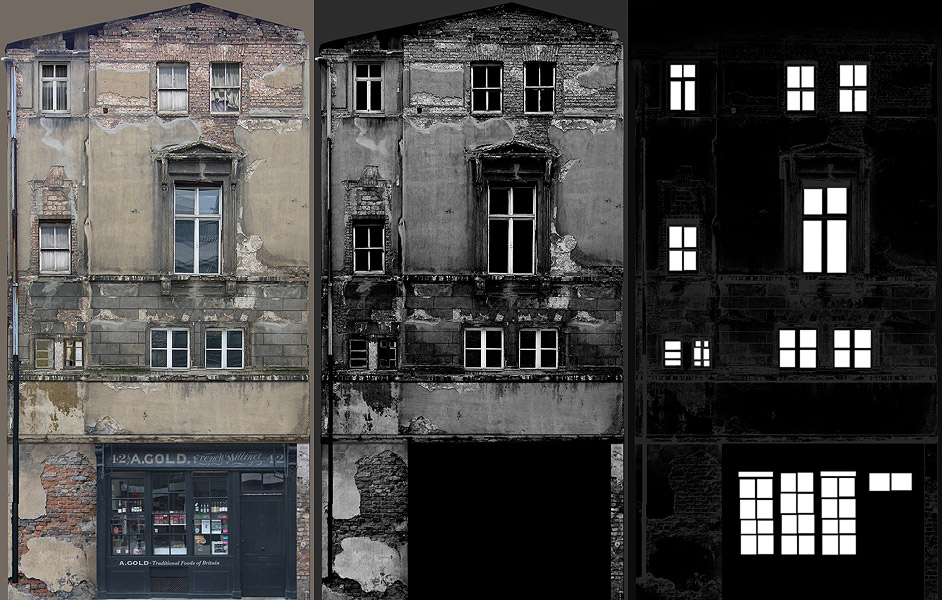
It’s key to remember the role of black and white values when applying bumps and reflection maps. In the Vray material, when you place a black and white map in the reflection slot, pure white is 100% reflective.
I find it better to make your reflective surfaces (such as glass) pure white and take them down in the material editor – usually to around 30-60%
 I added some objects and props from an earlier scene I made (see the victorian lamp scene in my portfolio).
I also added an open window and a washing line going from it to the chimney. I wanted to get across a feeling of activity and not just have the buildings be dead/empty.
 I began to make the ground plane. This was a challenge because I needed an exact kind of texture for both the paving stones and the cobbled street. I found what I needed on cgtextures and made one big ground texture out of the two in Photoshop.
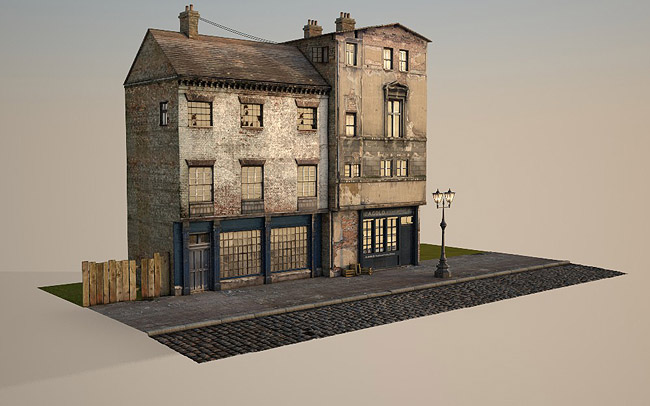 Then came the ground level detailing. I saved time on the above wood planks by having one single texture of a fence. I then made planks just wide enough for each plank of the texture and slid the UVW map along for each.
Below you can see a few unique additions to the scene: cloth simulation, ivy and trees. The cloth or sheet (hanging on the washing line) was actually quite simple. Here is a tutorial that is very easy to follow and will get you up and running with basic draped cloth in 3ds max.
The ivy was a free tool that lets you make ivy and import the mesh into 3ds max. You can get it here. It’s not awesome but it does the job! If ever the link is down (for whatever reason) just google: free ivy generator.
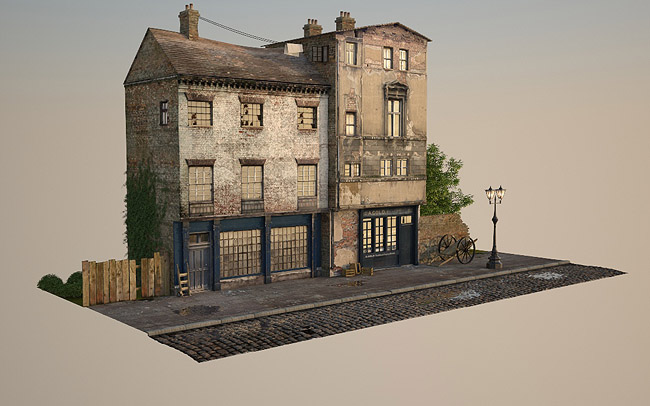
Next up, another cool free plugin by Itoo software called Forest Pack Lite. This makes trees and forests and is what I used for the trees and bushes show below…
 I also added a water plane. Just a very basic reflective material. Getting the height just right is key to making puddles.
I forgot to mention that the ground plane has a displacement map on it. A good tip for using a displacement map when using Vray is to use the displacement modifier and simplifly the map in photoshop (too much noise and detail creates a spikey bump). I use the posterize filter with some gaussian blur.
Below you can see the addition of a cart or ”barrow’ and a thing that shopkeepers would use. Not sure what it’s called but I found it in a victorian photo. Not too much detail needed on them because of their relative distance to the camera.
Lighting, rendering and post production…
Here is the light set-up. It’s very basic, just a Vray Sun and nothing more. I knew I would create a backdrop in Photoshop, so didn’t bother whith a HDRI background or similar environment map.
 For the base I thought I’d try to create the idea that the street was cut out. Below is a displaced mesh. The textures were large soily/earth textures from the usual source.
It looks crappy in the render but I tested it in Photoshop and knew that it could be saved in post, so carried on with it. The raw render just would not be good enough, so thankfully Photoshop can come to our rescue. Here’s the base by itself:
…and here it is in place with a bit of Photoshop magic:
 There was some slight adjustment in the levels etc. but nothing major. The sky was placed behind the buildings and I had to render out an alpha pass to get behind the buildings which I then placed in a masked layer.
The final render was 3000px and didn’t take too long – maybe a couple of hours.
One other thing worth mentioning is the reflections. I dropped a HDRI image into the reflection slot in Vray’s environment rollout. It gave a nicer reflection than the Vray sky which was just too empty and void of any detail.
Overall I’m pretty pleased with the final result. It ended up being something unique because of the ‘cut out’ effect. For my next project I want to create a whole street. Seeing as this took about a week, it will be quite a daunting task!
I hope you learned something from this tutorial. Give me a shout if you have any questions!




which tutorial???
All the tutorials mentioned here are linked to.
That’s amazing, thanks for sharing =).
You’re welcome 🙂
hiya,
First off very nice scene, congrats. Love the feel of this. I went to the two texture sites you mentioned but could not find any sign of the textures you used here at those sites. Are they gone? If not, would it be possible to link to the textures? When following a tutorial its nice to have the things used .. makes it easier to follow and try.
Thanks again – great work in general via your portfolio ..
Sorry I’m a bit busy at the moment. I definitely got the browny/beige building from here http://www.isourcetextures.com/catalogue/buildings/old/ and there’s loads of shop front images in the shop front section. But you can find something similar. It’s better to make your own unique thing anyway.
Thanks 🙂
Good to hear your busy – deserve to be so – hope you are being well rewarded.
Yes – I realise being unique is the way. That comes after working out how the tute works 😀
thanks again
Fine, you’ve twisted my arm. Here are the textures:
http://www.cgtextures.com/texview.php?id=20718&PHPSESSID=n04o1dj1p0sjmqp589oht698f6
http://www.isourcetextures.com/catalogue/buildings/old/buildings-old-buildings95
But they need work, so find some nice windows and get cracking in photoshop!
This is a great tutorial, I learned some new things and enjoyed it very much.
Thanks, glad you liked it 🙂
Excuse me for asking, I saw there’s a water puddle on the tile of the street; how actually the trick to make that is it on the texture or what?
oh that’s very simple. Just make a flat plane object, put a reflective material on it, like a mirror, lay it down on the ground (or just below the ground actually) then distort and pull the ground down in places to reveal the plane underneath.