Achieve a photo-real effect in your digital paintings with this stone ruins digital painting tutorial…

NOTE: See bottom of page for animated gif step-by-step.
I’m pleased to be bringing you an in-depth look at a recent digital painting study I worked on where the subject matter was a stone roman ruined temple in harsh sunlight.
I absolutely love direct sunlight on hard surfaces as a subject for painting study. When you understand how colour works inside a shaded areas and in the lit areas, and then apply that in your paintings, you can start to see photo-real lighting emerge. It’s quite exciting and satisfying to see such lighting come together, and painting in photoshop makes it easier than using natural media.
So here’s a step-by-step tutorial on painting such a piece in photoshop. Tablets at the ready!
Before we start: The source photograph
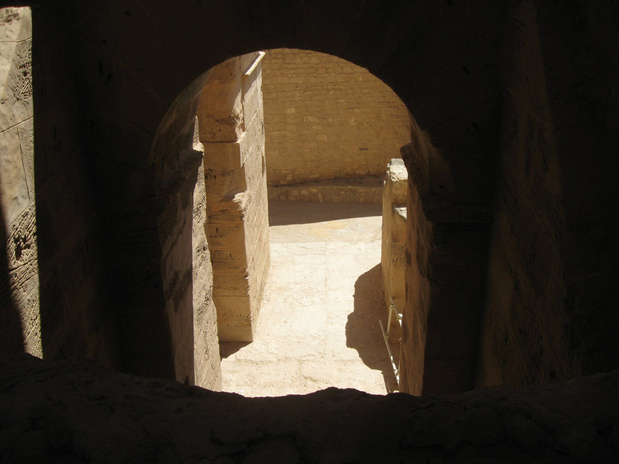
Before we even start step 1, we need to consider our source image. I got mine from EveBlackwoodStock on deviant art. I searched under the term ‘shadow’ I think, under ‘stock photography’.
Either way, that deviant art account has some great images if you like this kind of lighting – and they’re high res too.
Step 01: A little bit of cheating is required…
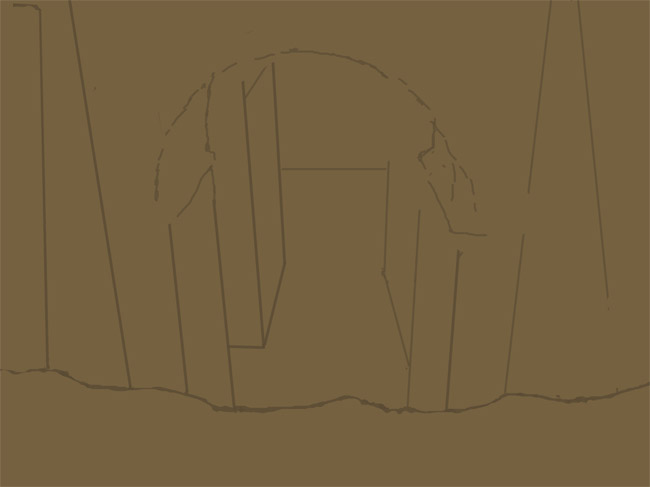 So what I mean by cheating is that to get such a photo real effect, your perspective has to be spot on. Now, if you like you can work it out by ‘guess work’ so as to perfect your perspective ‘eye’.
I myself didn’t want to do that for this painting as I wanted to focus on light and texture. So I drew in perspective lines in a layer on top of the source photo, then dragged that layer into my photoshop document and worked out the rest.
The above image is the resulting line-work which I will use as a guide to paint within.
My document was only 2500 px wide at 72dpi. I would suggest doubling that to 5000px @ 72dpi. I didn’t want to suffer too much lag due to high file size.
Step 02: Blocking in the light and shade
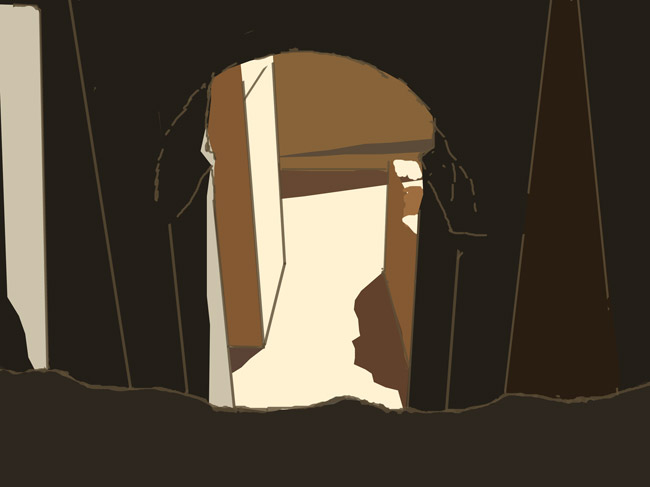
This is an important stage as here we’re getting the overall light values down.
Something I learned about digital painting (or any painting for that matter) along the way is the importance of a decent value range in your images. Most amateurs, you’ll notice, tend to have very medium/grey values in their overall range. It works well, as in the reference used here, to work with good contrast levels.
Already, if you squint at the above image, you’ll get a vague sense of photo-real lighting.
TIP: Try not to colour pick at this stage, although a technique I can advise is to guess your colour, then paint it over the reference photo and see if you got it right!
Take the ground for example. Pick a nearly white creamy/peach and paint onto the ground in the reference photo. If you see almost no difference you got it right, if you’re way out then observe whether you’re too light/dark/saturated etc. and adjust accordingly.
This will help develop your understanding of colour in no time!
Step 03: Defining outlines a little more
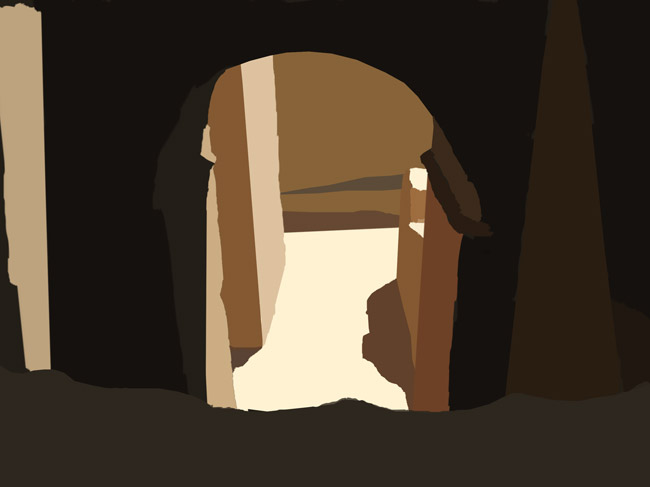 Okay. Let’s remove our guides.
We usually notice, when removing line-work, that our actual outlines are a little fuzzy, so start to define them more/make them less clean if they’re stone or maybe more clean if need be.
You may also notice in this image that I’ve tweaked some perspective.
Everything must line up pretty well or the whole thing falls apart, so I began to push and pull a few lines here and there.
Step 04: Getting the rock/stone texture down
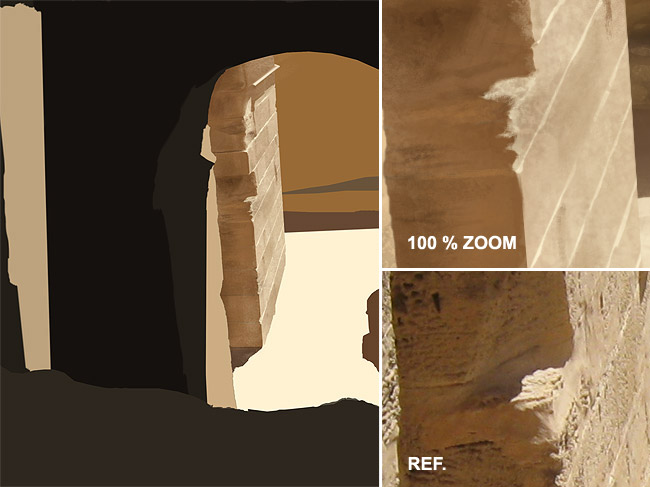
Apologies for notting having more work-in-progress shots for this but what I have instead is a 100% zoom on my digital painting and our ref under it which shows how much detail is required to give a realistic finish when zoomed out.
As you can see it’s by no means perfect but it doesn’t have to be. In fact, we’re not going after perfection as that kind of defeats the purpose of painting in my view, but we just want enough to suggest realism.
Here I paid attention to light direction. Notice how light is hitting the top of each stone/brick and defining those lines.
I also don’t recommend fully detailing one piece of your painting first. I did so because I wanted to see what was possible before then applying that to the rest of the painting.
I can sometimes suffer from a lack of confidence at the early stages of any painting. Getting one area tight can give me a) the confidence and b) the information to carry through to the rest of the painting.
Step 05: The ground plane
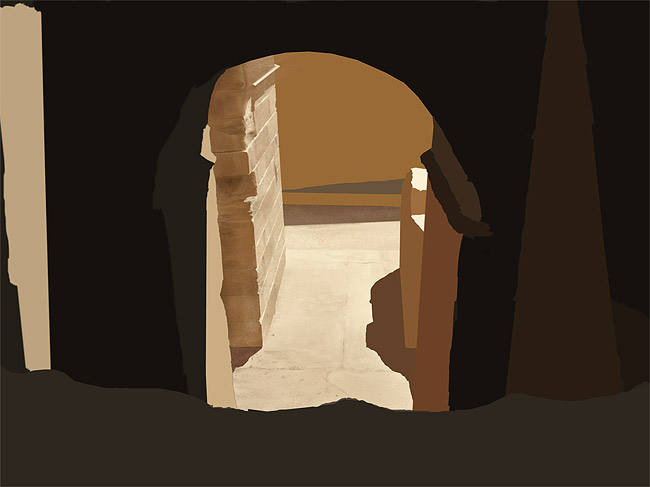 I was a little nervous about trying to make something so vague look realistic.
Here’s the close-up comparison:

Again, as you can see, just enough detail was needed to give the impression of stone.
Even on such a flat surface, attention must be paid to light direction for any slightly raised areas.
Texture was most important here. For this whole digital painting I used the photoshop chalk brush with ‘texture’ and ‘dual’ enabled which gave a very rough, chalky effect. Obviously there’s more to the brush than that. If you want the brush, contact me and I’ll send it to you – it’s pretty awesome.
Other times I used my free rock brushes for photoshop but only sparingly. It would be too easy to slap in a photo texture to get the desired effect. Better use some brushes (and not so much of the photo style brushes btw).
Step 06: The right hand wall plus some shadow
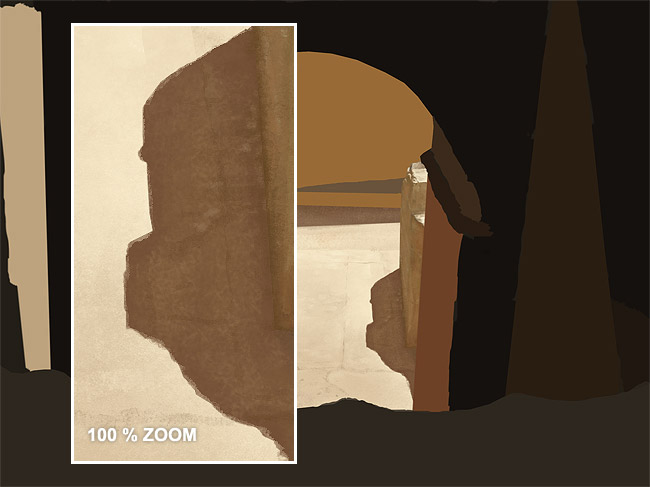 Same principles as above. Here we have our first real shadow to contend with. Bit of a make or break when it comes to achieving realism.
The key is to first put down your darks and then paint some lights back in. If a shadow is just a flat dark mass it won’t look convicing. Shadows aren’t just black, and aren’t just solid.
Put in some detail and some lighter areas into your shadows and you’ll see the 3d effect emerge in your painting. It’s very cool when done right.
Again you’ll notice just enough detail used here to look realistic when zoomed out. This is why we aim for very high document sizes.
Step 06b-g: The dreaded back wall. Stone after stone…
 Oh I didn’t enjoy this part.
I have a thing about stone ever since I began a painting of the interior of the Great Hall in Hogwarts and the stone work eluded me to the point where, to this day, I have yet to finish it! Hence this study I guess.
Firstly, I had to tweak the placement of the back wall several times (you should notice in all the images so far).
I worked on the base first – putting in those flat stones and worked on the shadow (1 & 2). Fairly easy stuff.
Then I tried to get the occluded area (the dark corner) to look nice and shaded. After a few failed attempts I cut out the bottom ‘wedge’ bit and stuck it on a new layer.
I then painted using a soft round brush behind it to give a gradual soft shadow – the chalk brushes weren’t helping me in that instance.
I also couldn’t quite figure out what those little dark things were so I went back to deviant art to download the full high res version of the ref pic so I could actually see!
This helped a bunch.
Time to get my hands dirty and start making individual stone bricks (sob). This time, the ref pic almost went out of the window as copying brick by brick would have resulted in death/insanity.
The key to pulling this kind of thing off is in desperately finding a shadow somewhere. Something that shows form and definition.
I found my answer in the shadow above each brick. It’s very subtle but look at the 60% zoom and you’ll see.
There is much gradient and subtle shades in the wall, so I used many layers infront and behind the bricks to get it just right – knocking them back here, bringing them out there.
All in all it was a bit of a battle with many many undos and deletes. I’m not 100% happy with it but it’s worth noting that when you look at the painting as a whole, the illusion is a cohesive one.
That is to say that if most of the painting works, the whole painting works and we don’t quite notice the less tight parts as long as they’re tight enough.
Ok, on to the foreground!
Step 07: Foreground
 I thought this was going to be tricky but it wasn’t really.
Again, it is worth mentioning that even in very dark shadows, you still need to define form and darker shadows within shadows.
I improvised much of this, drawing loosely on the reference. As it’s such a minor element of the scene it really didn’t warrant being super finished and tight. I also used my rock brushes a little for this to give a sandy effect.
Step 08: Interior light, shade and perspective
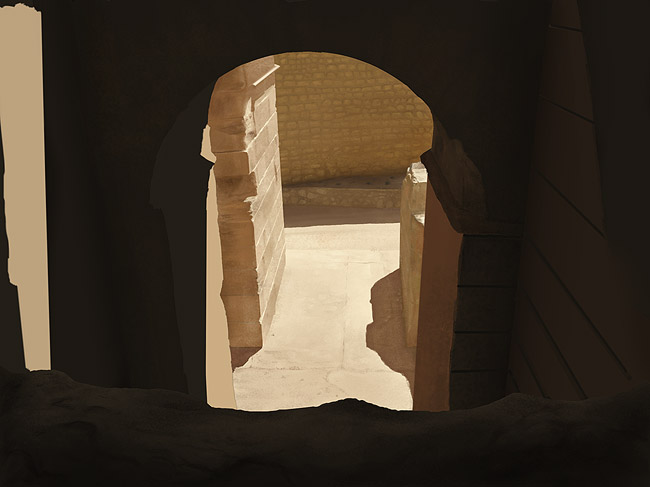 So, time to tighten up that perspective again.
The brick lines can’t be messed with. They all line up with something, so I really had to study the reference and get it right.
I threw down guide lines and some basic values – again, shadows within shadows type stuff.
The arch was next. It was tricky and unlike the first sunlit pillar I have a few more progress shots to share…
Step 09: Dealing with vague reference
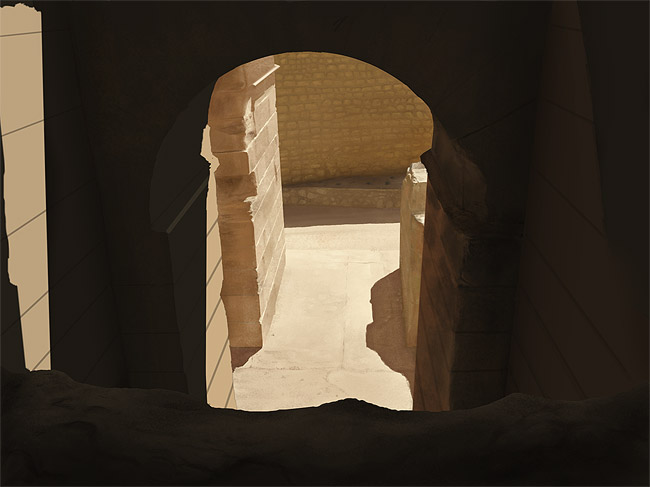 Working with the stone/perspective lines really helped ‘sell’ the illusion of 3 dimensionality.
At first I figured that because the stone work on the right hand pillar/arch was vague I could just guess it but my perspective guess was way off. So I worked a little tighter and defined just enough stone placement to illustrate direction.
Again, the reference was kind of vague for that pillar so some texture/lighting improv was required. Similar to the back wall, one can only put in so much detail to get the point across.
Stone is so tricky as it’s thousands of particles with differing light and shade. We must ‘reduce’ it down to a managable ‘suggestion’.
As I mentioned before, I spent a lot of time painting my guessed colour value onto the reference picture to see if I was right. By this stage my guesses were getting fairly close.
Step 10: Brick by brick
 You can compare the previous image to this one in terms of detailing up that right hand pillar. By this stage I felt it was complete. Onto the right hand wall.
I worked in the lines, trying to keep that perspective tight and then threw in my values using the good ol’ chalk brush.
Because all this is in such dark occlusion, I wasn’t too worried about accuracy. We really want the audience to focus on the stuff that’s well lit and in the centre of this composition.
Step 11: Almost there
 Some work was done on the arch here.
As I mentioned, I didn’t feel it needed more than a curteous touch of the brush as it’s in such shade.
We’re getting close to completion now. A few values thrown down on the right hand walls before going in for the detail.
I did have to (again) redress the perspective of the left hand pillar near the top. You’ll see the ridge get tweaked in the next couple of stages as it just wasn’t quite lining up with all the brick work etc.
Step 12: Light and shade on the same face
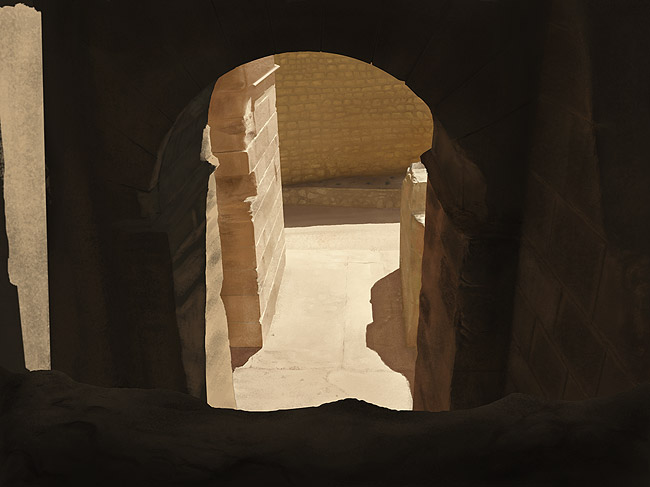 At first I thought I would have to mask out or separate the light/shade but I just kept it on one layer.
Keeping things on one layer allows for a faster work flow. You can colour pick, lay colour down and blend with ease and speed without getting confused as to which layer you’re on.
I knew this stage would be crucial as there’s good lighting to work with. If I pulled this off ok it would help sell the rest of the painting.
Once again, I wasn’t 100% faithful to the reference because of all the minute detail. To restate the point though, if you can ‘represent’ form, light and shade without the need to copy every tiny blemish and particle, your paintings will have a little more of you in them.
At these stages I was once again saying a lot of no’s. It had to be just right to work and I wasn’t going to throw away the rest of the painting by not getting this right. You really have to tell yourself that it’s not good enough until you’re genuinely satisfied.
Step 13: Genuinely satisfied with the pillar 🙂

Once I got the detail in I really wanted that area of light and shade to pop, so I got to work with the trusty colour dodge…
TIP: The colour dodge feature in photoshop is awesome for creating hot areas in your digital paintings. Simply take a regular brush, choose a light colour or just plain white, then from the ‘mode’ drop down at the top choose ‘color dodge’, and finally make your brush around 10-20% opacity so it’s not too hot.
Note that for this to work you have to work on solid pixels, so you may need to flatten the layers of the area you’re working on.
You can see the above painting, even at 100% zoom looks fairly realistic.
I also refined the edge of the pillar slightly. Notice the tiny indent where the edge of a brick meets a corner and makes a kind of lip. This is useful in selling the 3d form.
Step 14: Final lighting/texture challenge
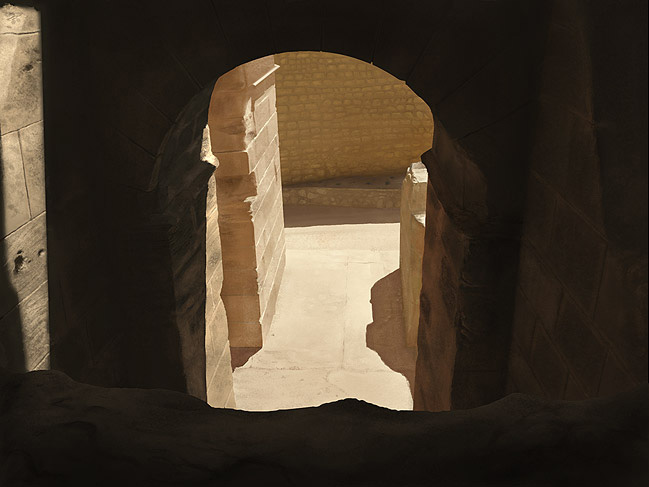 So, the motto here, as always, is ‘near enough’.
The detail and… just… detail of that sunlight bit on the left is just insane in the photo ref and it’s messy too but more to the point, it’s not necessary to our mission. So again, I improvised.
However, much attention still needed to be paid to light direction. Once again we’re dealing with a very flat surface so we have to give extra care to subtle shadows and highlights on the tiny lumps and bumps.
If you do this and work in enough detail you’ll step back and see it all come together and work. But you must not settle unless you’re genuinely satisfied.
The way I work in digital painting and design is the motto I made up of “eventually, enough no’s make a solid yes”. I think a lot of amateurs out there haven’t said ‘no’ enough to their quality.
As one continues their journey toward mastery/genuis/not sucking one starts to redefine what constitutes a ‘no’. This is when it’s good to look at work you did a couple of years ago! What did you consider ‘good enough’ back then?
Ok, that’s all for now. Stay tuned for more digital painting tutorials and digital painting inspiration! Oh and follow me on Twitter (i only tweet cool stuff!).
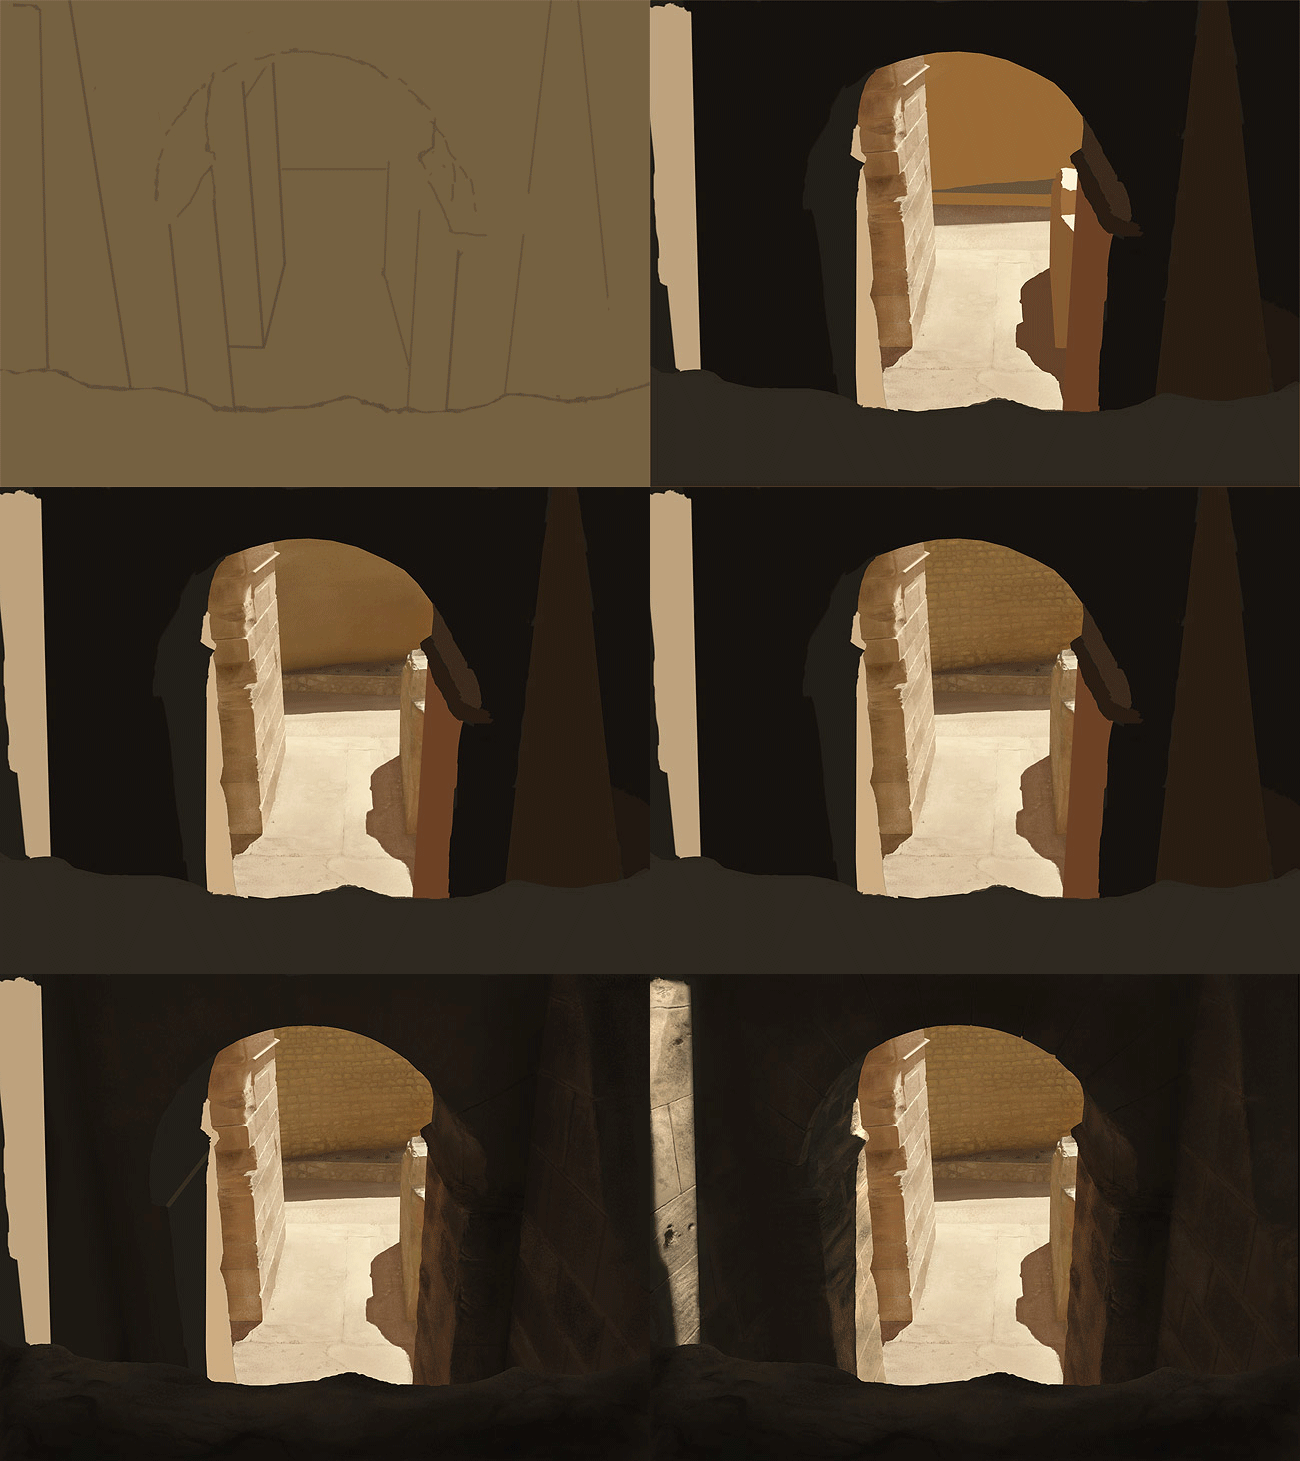
Final animated gif step-by-step!


Too bad you did not include the painting steps of the stones/bricks in step 4. As a rookie I am very curious to know how you did that. Thank you for the tutorial, fantastic work.
If you look at the close-up it should be fairly obvious. Using chalky brushes and colour-matching the reference you can achieve quite a real look. And as the close-up suggests, you don’t even have to be that detailed. When zoomed out it all comes together. In fact, you could even argue that I didn’t colour match the reference very accurately in that comparison. Glad you like it otherwise 🙂
Wow, you have a LOT of patience. If I can’t finish a painting in a day, I never go back to it. 🙁 Nice work.
There are long form studies and short form studies and then speed studies. This was the former. It’s usually good to spend a day or two at most but until you’re good, you can’t really focus too much on time.