This post-apocalyptic tutorial focuses on a mixture of photo-manipulation, matte painting and 3d integration…
Here’s the final image (click for full size):
This image reached the 25 semi-finalists in a recent DeviantART competition. You had to choose one of three photographs and convert them into an image with an apocalypse theme.
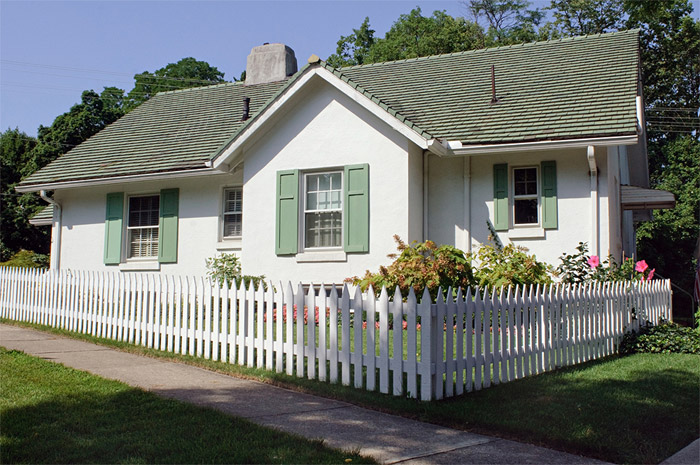
Here’s the original photo:
Getting the thumbnail
It’s interesting that at the semi-finalist stage there was an awful lot of bitching by the people who didn’t get through. A lot of those people submitted art that was often about as good as my rough-as-hell thumbnails above.
I myself put in about a solid week of work including a full day of research and thumbnail sketching. The reason I mention this is because some people just don’t approach their work like a pro but want the results a pro gets.
So above you’ll see my thumbnails. I wanted an eerie aliens-have-invaded feel to it. I really liked the last one (bottom right) but later learned that you can’t scale down the house. As such the house would be too up-close to fit the character in so I just went for the night colour scheme and the alien pod in the roof.
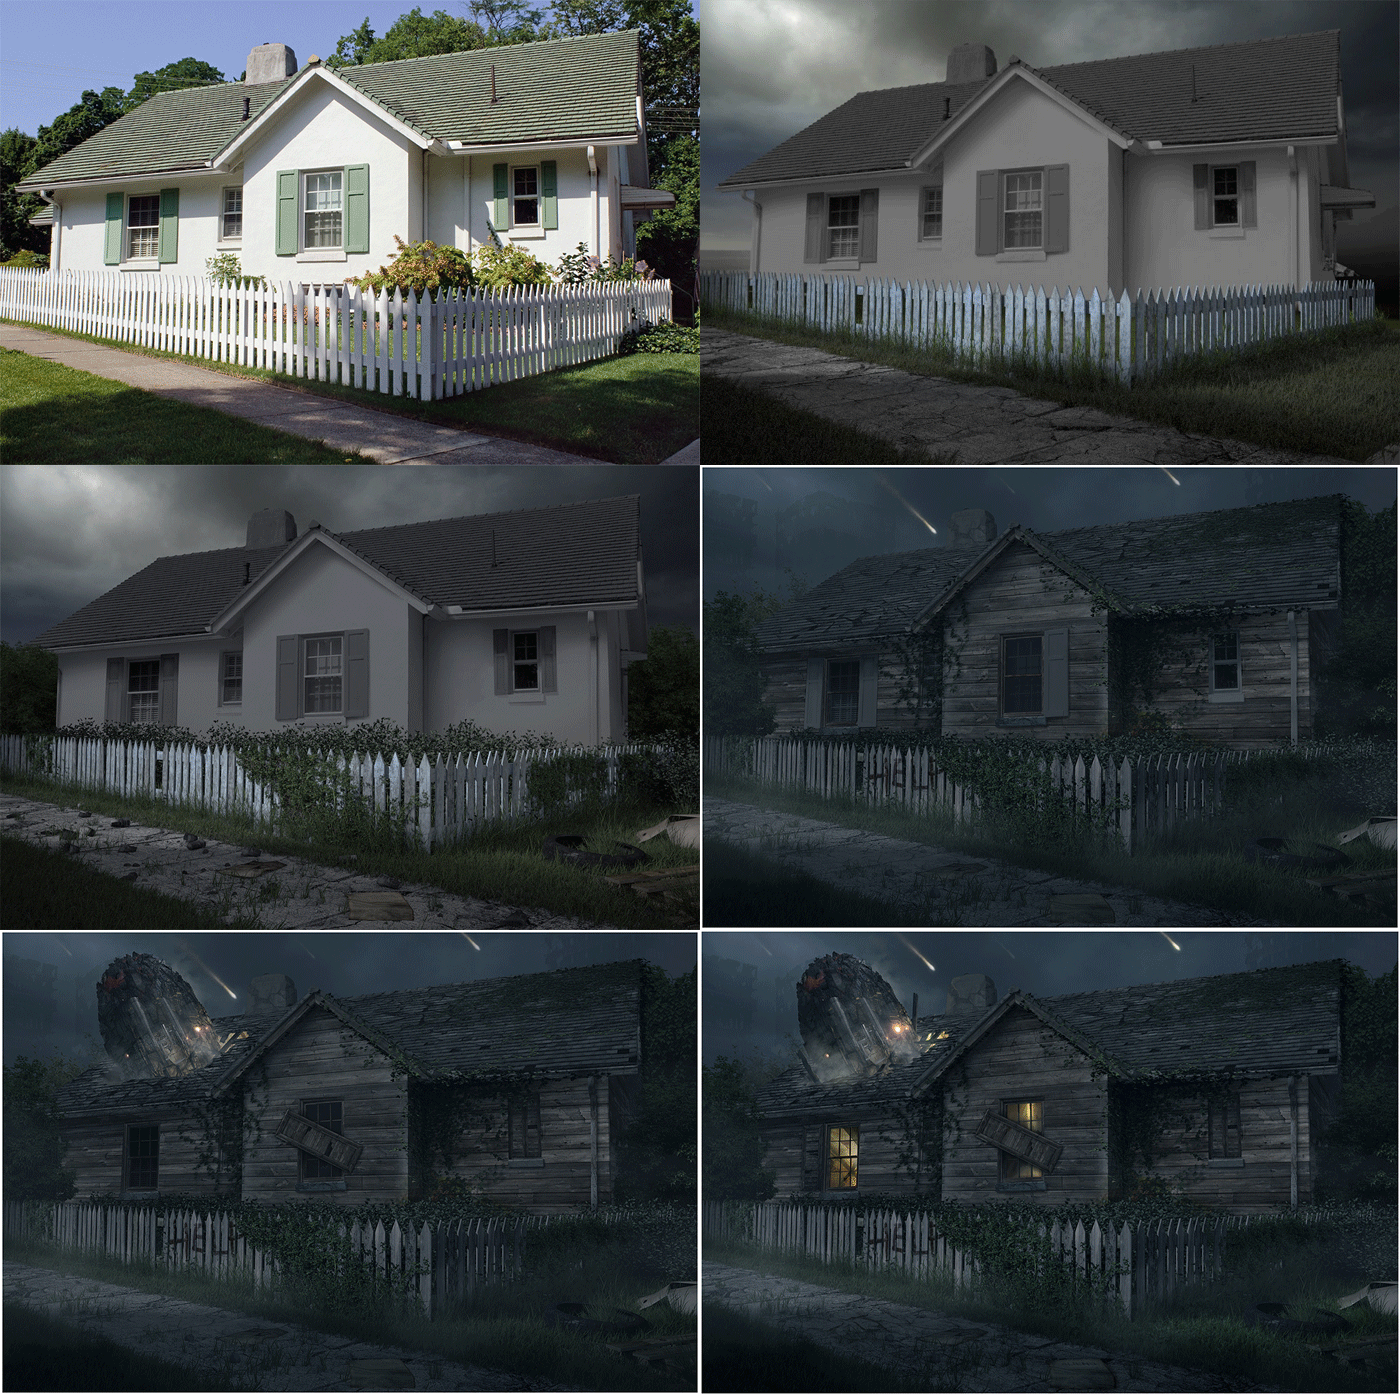
Main stages:
Here’s an animated gif of the stages from start to finish…
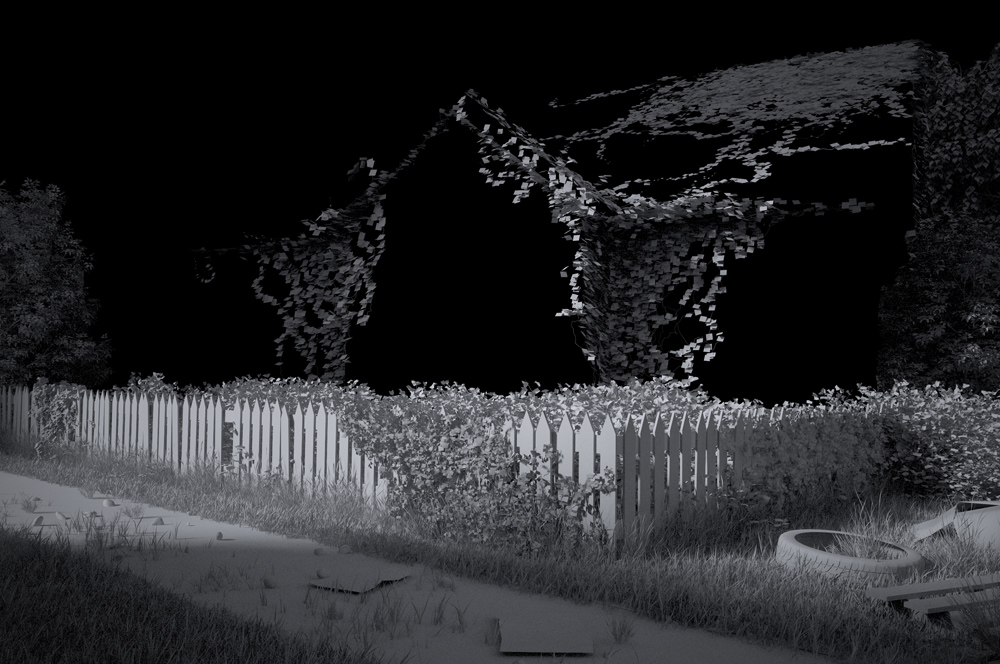
…and here’s a clay render…
So a little about the process.
I first off had to do a good ol’ day-for-night trick. As this was a totally obvious daylight shot it was very tricky. If you want to do a day-for-night, you’ll need an overcast shot. So I erased all the hard shadows and replaced them with soft shadows. You’ll see that around the 3rd/4th frame.
I cut out the house so I could change the background too. I then brought the photo into 3ds max and had to camera-match… which was a real pain in the ass. If you look at the clay render you’ll see that I’m building things around an invisible house. So I had to build a house of guessed size and proportions and then camera match so that the two laid over each other perfectly. This took ages.
Here is a tutorial that I followed to help teach me camera matching.
Next I recreated the fence, made it look old and deleted the odd post. Then I used Forest Pack Lite to create a LOT of vegetation. The tweaking of this was also very time-consuming as you have to sort of simulate how nature would take its course while dealing with composition and a slowing computer!
I used Guruware Ivy for the ivy. This was easier than using Ivy Generator as you can use it inside 3ds max. It tends to not be as dense but you get more control.
Once the 3d work was done, I made the house structure unrenderable and rendered the scene on black with a pass for z-depth (for atmospheric perspective/fog). I then saved it as a tga so it would come with an alpha channel. For some reason, a black environment background works best in all scenarios when foreground needs to be cut out.
It was then brought into Photoshop where there was much painting and texturing using photographs. No need to really go into it. We all know what it involves – bring in a photo, use the transform > distort trick and then use Overlay (most of the time).
And that’s it. Hope you got something out of this making-of. Do shoot me a question if you have one and I’ll get back to you!


Found this post while googling for some architecture-related tutorials; what a small world, i was among the semi-finalists too (and i remember the unbelievable amount of bitching) 🙂
Ha, yes indeed. In order to be a pro you have to be able to admit you suck!